
Last week I received an email from Rajiv, an EM resident at the University of Toledo Medical Center. He was curious about whether non-absorbable sutures like prolene can be used in a running subcuticular fashion with intent for removal later. And if so, what technical considerations go in to placing these sutures in an easy-to-remove manner?
The answer: absolutely! In fact, some experts in wound care exclusively recommend the use of non-absorbable sutures (rather than embedded absorbable sutures, like vicryl, which is what I demonstrate here). The reasoning is that buried knot placement and embedded suture material under the skin increases risk of granuloma formation, ugly scarring, and infection. Removal of the suture material reduces these risks. I was pleased to receive Rajiv’s question as it reminded me that I wanted to post some tips on this closure method, and some pearls from the recent literature.
When I perform running subcuticular laceration repair with non-absorbable sutures, I like to use either monofilament nylon or polypropylene suture. Instead of the technique I describe in my video on the start and finish to the embedded running subcuticular suture, I simply run the suture and then use steri strips to “tack down” each end of the suture material on either side of the wound. At the time of removal, the strips can simply be pulled off, and the suture material pulled through from either end.
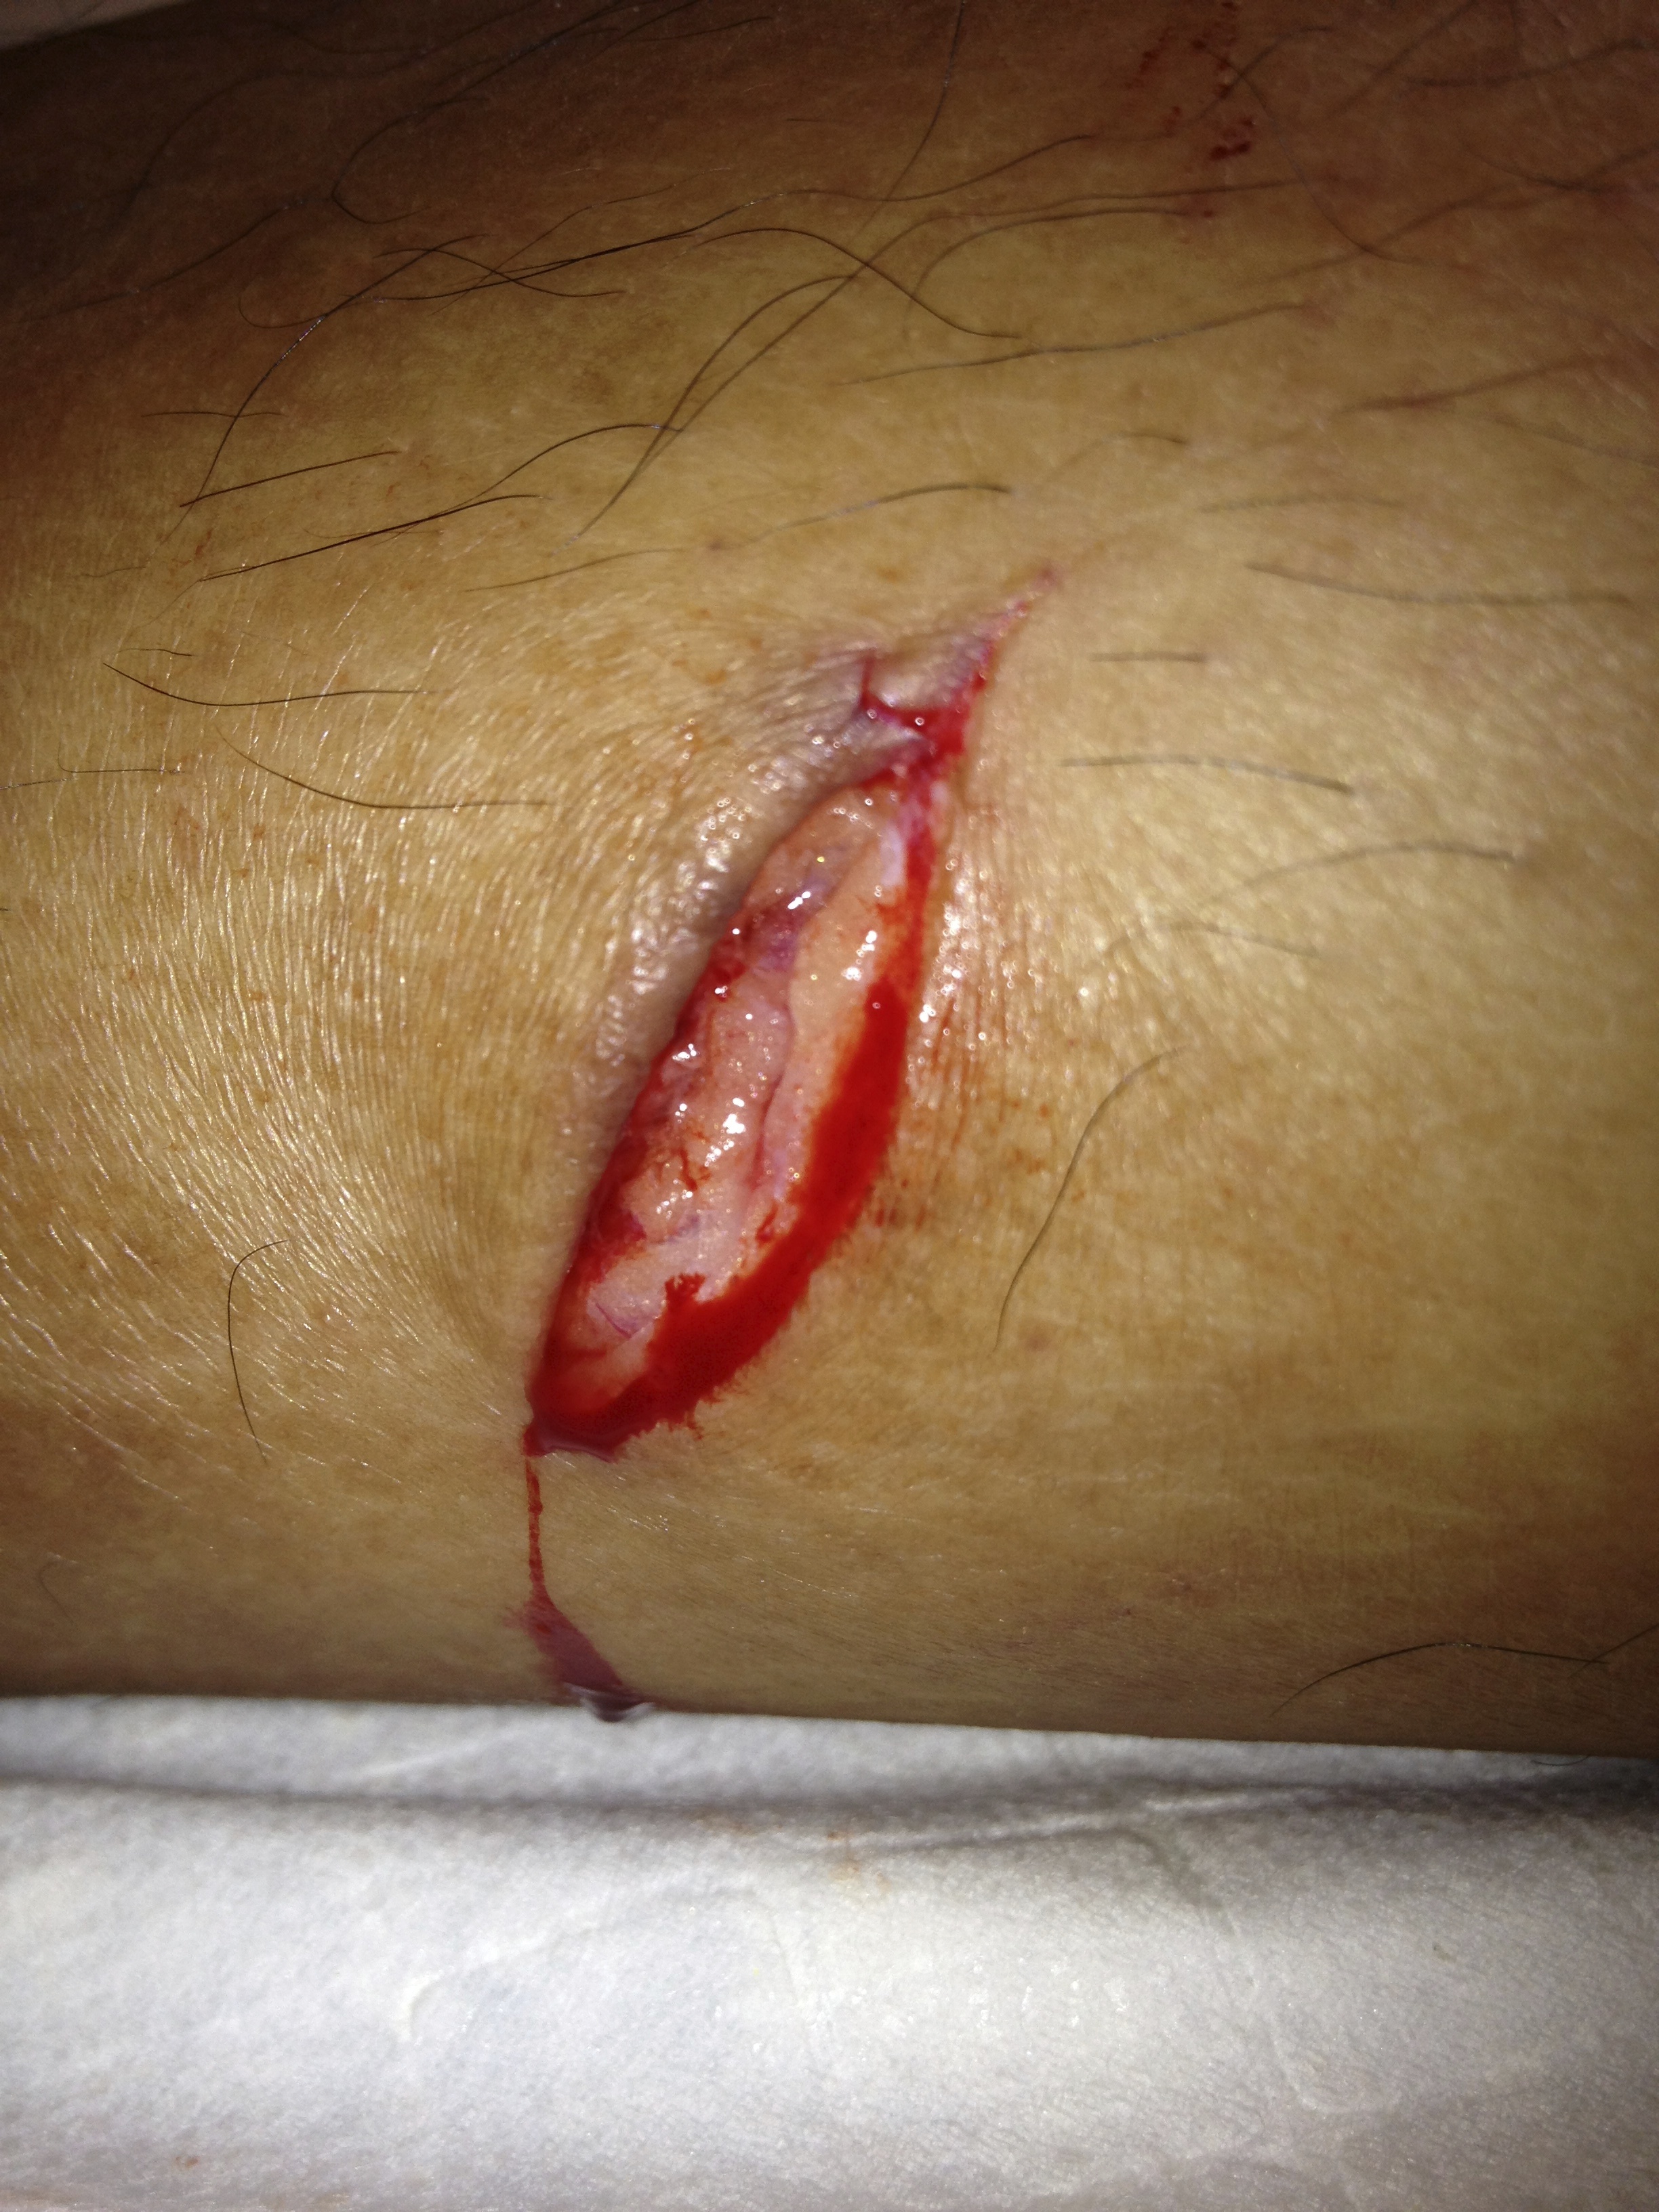
Pictured above is a traumatic, straight laceration of the leg. The linear, clean wound edges made it a reasonable candidate for running subcuticular closure (I did place a few deep dermal sutures to relieve the tension on the wound first). However, given its lower extremity location and the higher infection risk associated with this anatomic location, I didn’t want to leave embedded suture which could take months to absorb.
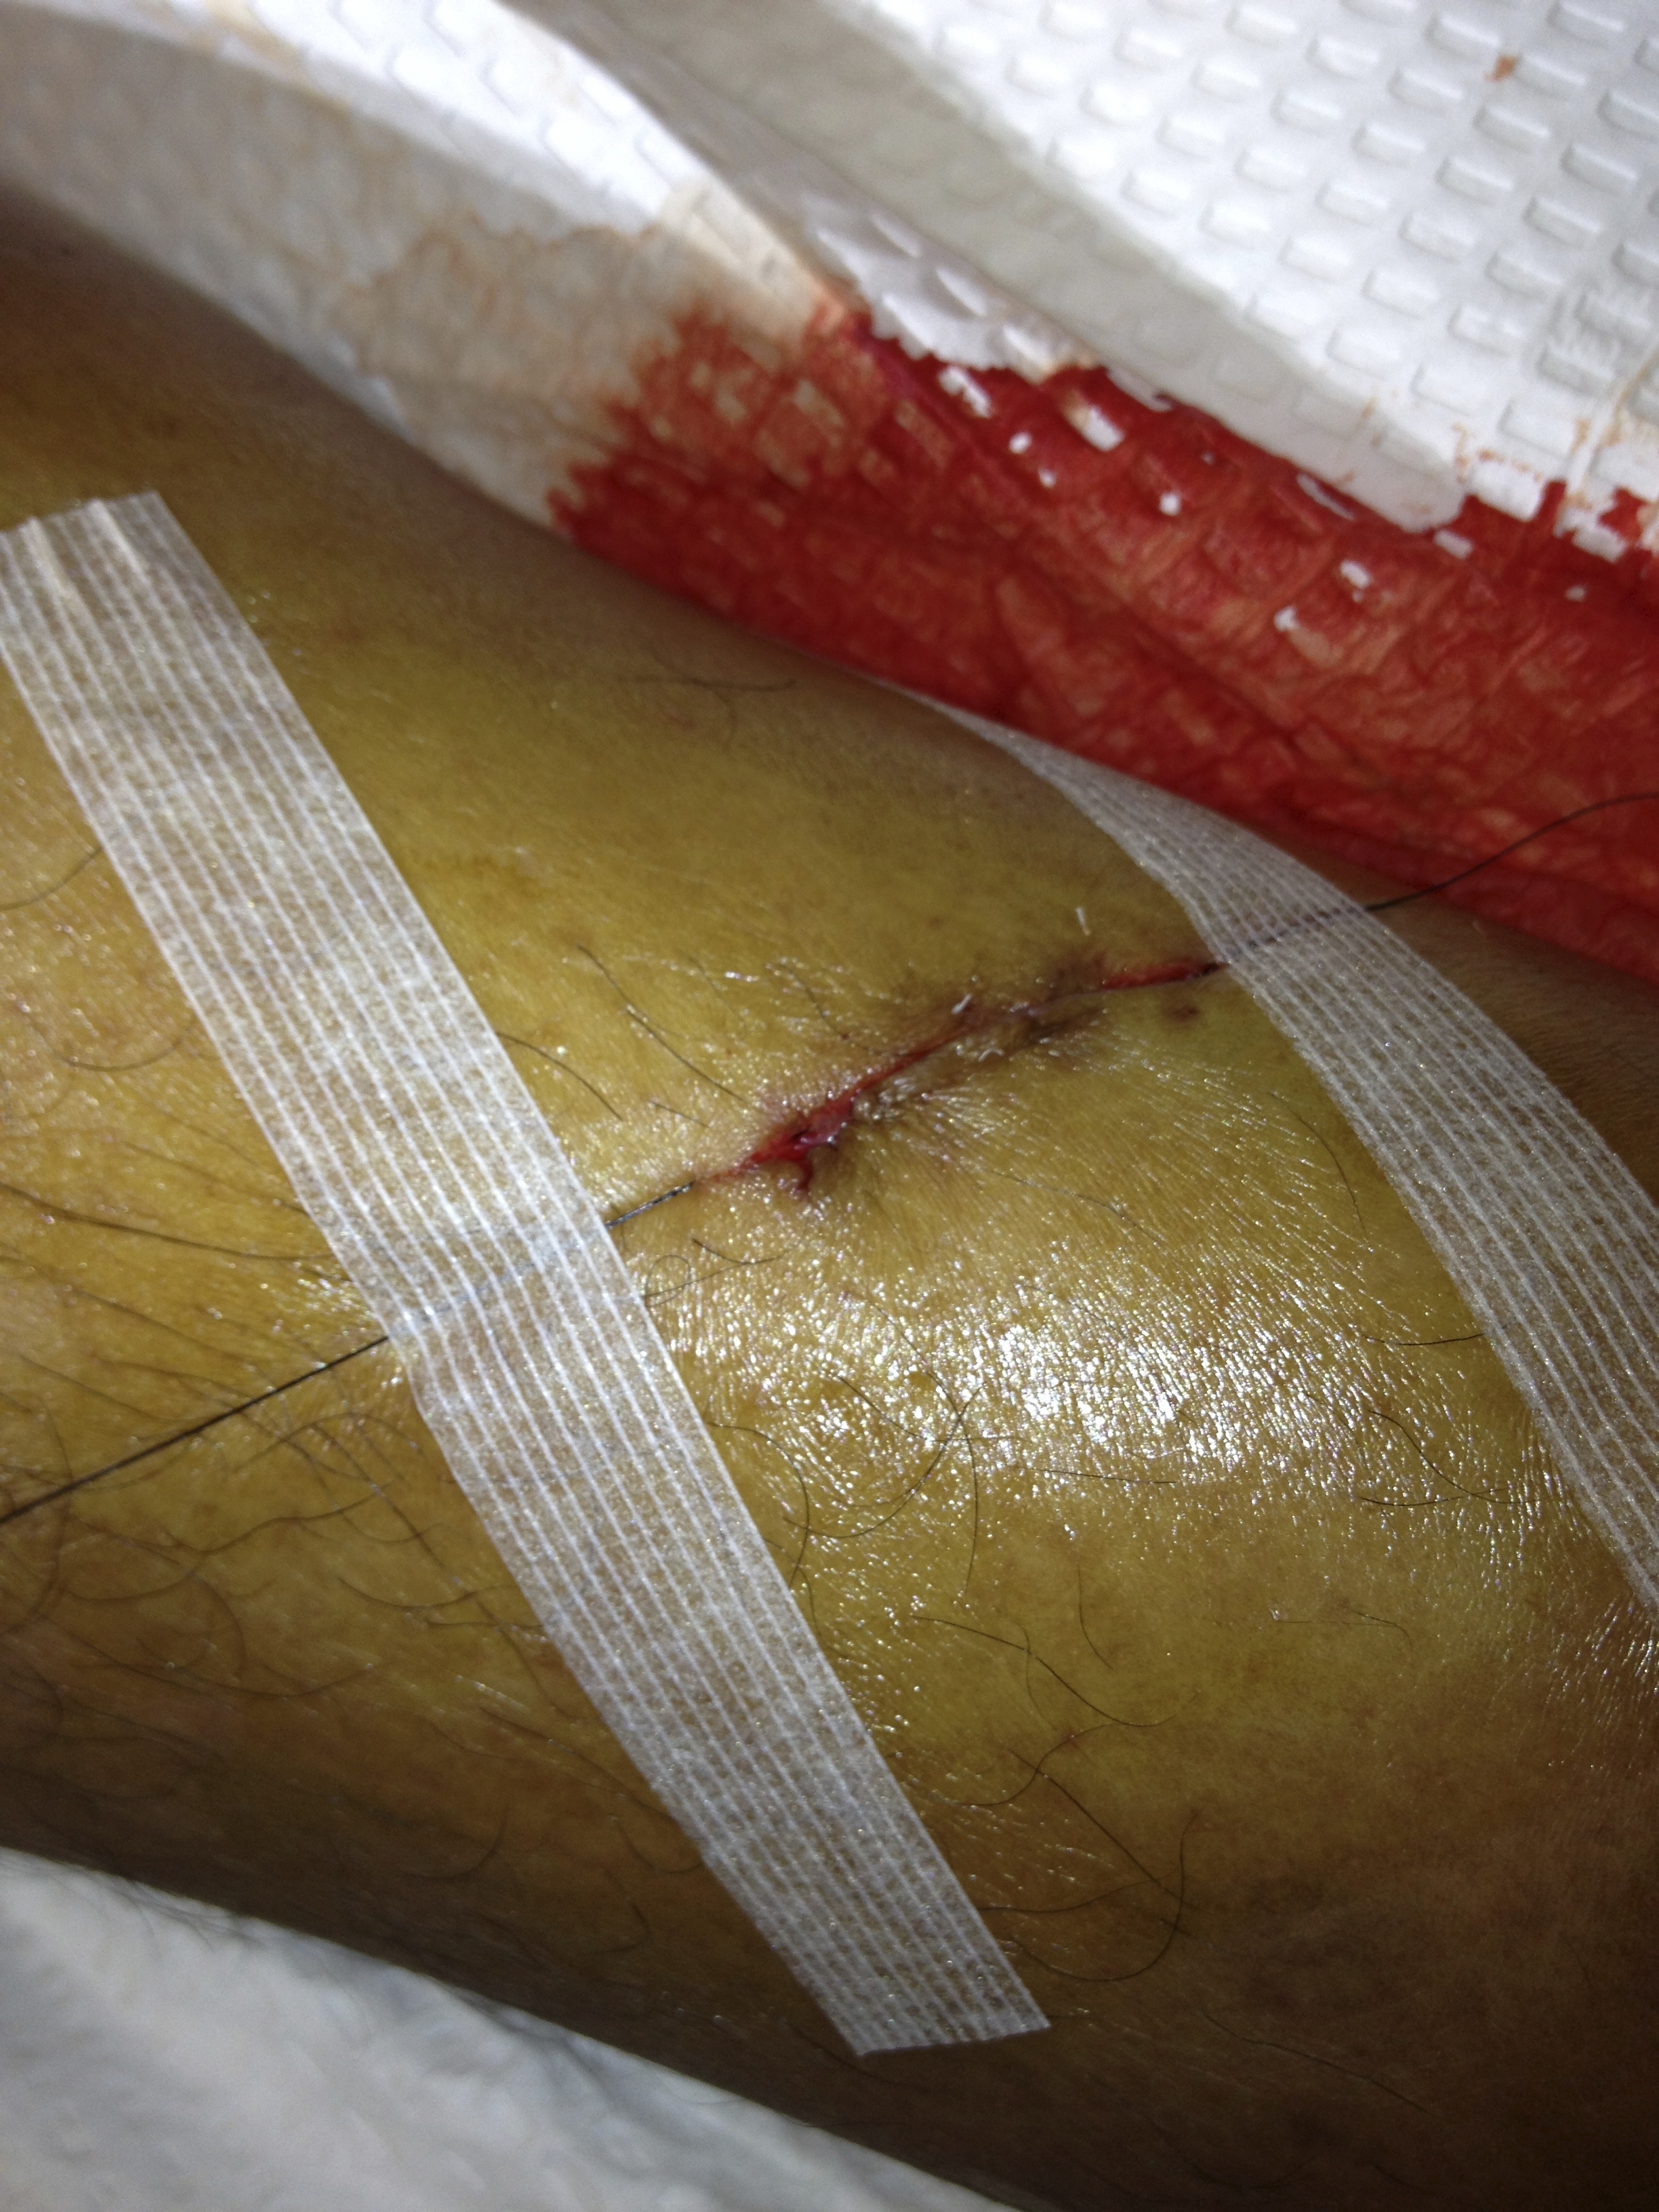
Instead–after running the suture and opposing the edges with nylon– I simply taped down the edges with tissue adhesive tape.
But what if you are suturing a wound where the ends cannot be easily secured beyond the margins of the wound (e.g., a long laceration on the back of the hand?) A tip from the 2012 dermatology literature describes an elegant way to secure the non-absorbable running subcuticular suture in this situation with adequate suture tension.
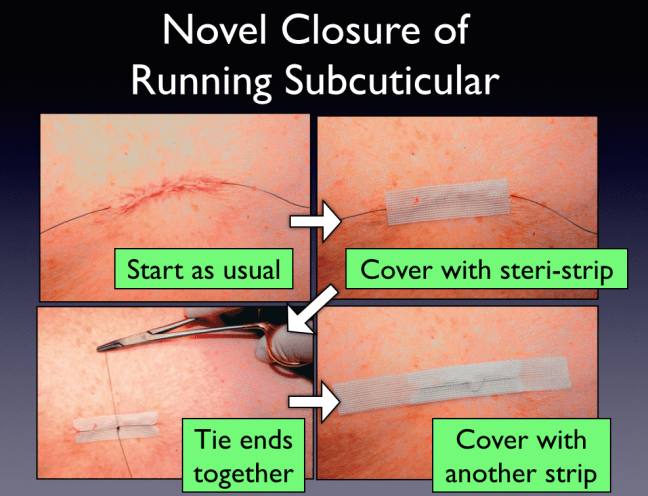
- First, you use the running subcuticular method as usual with a non-absorbable suture.
- The needle is removed and the suture is pulled through such that the ends are equal in length. The suture is pulled taught to make sure the wound edges come together as desired.
- Then, a steri-strip is applied directly over the wound. (The strips can also be applied transversely if there is more skin tension.)
- The suture ends are then tied together at the midpoint over the adhesive strip.
- Finally, a second longer strip is placed over the suture to mask the knot.
I’ve not personally found many opportunities where this type of closure would be useful in the ED setting. I imagine for the patient with a straight, clean wound who likes things looking tidy, there may be a role for closure in this fashion. There is perhaps some added benefit in wound edge apposition with the addition of tissue adhesive tape, but it’s not an evidence-based practice.
While suture removal has the benefit of reducing foreign body risk, the removal of suture material also poses some threats to healing integrity. Pulling the length of a suture through a long wound traumatizes the tissue and may lead to dehiscence.
A technique modification from the dermatology literature for nonabsorbable running subcuticular placement may solve this problem. The technique is predicated on the notion that when a running subcuticular suture is placed in a wound longer than 5 cm, there is a higher risk of wound trauma as the suture is removed. It tends to become embedded and snag. Thus, these authors recommend “modified” interrupted subcuticular suturing.
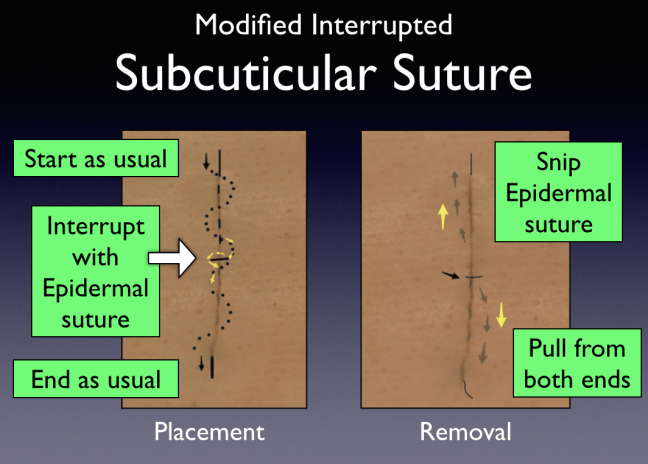
- Using this technique, you begin by using a nonabsorbable suture, running the suture as described above.
- Midway through the closure, the suture is intentionally looped in to the deep dermis and then out of the epidermis before continuing the running subcuticular suturing. This will give the appearance of a single simple interrupted suture at the midpoint in the wound.
- The start and finish of the suture can be performed in any fashion.
- When it is time for suture removal, the midpoint loop can be cut, and then the suture pulled from both ends, so that each piece of the suture only traverses half the wound length.
I hope these techniques are of value to your practice. Please post any comments on your experience using them.
Thanks Rajiv for your question! …and, a note to other residents/students: please feel free to email your questions in laceration repair–you may see them as a subject of a future post!
