
In Part I, we discussed some of the steps in evaluation and preparation of a lip laceration to optimize repair. Here in Part II, we’ll get in to the nitty-gritty of performing a repair. All of the key points in this post are discussed in this 3 minute video, detailing a repair in an ED patient:
Lip Laceration Repair
The central maxim of lip laceration repair is preservation of the vermillion-cutaneous border. This means, making sure the pink contour of the lip remains perfectly aligned. Aside from having steady hands and excellent vision, how can we assure this? Below is a description of the technique, and a few tricks that might help you.
Technique
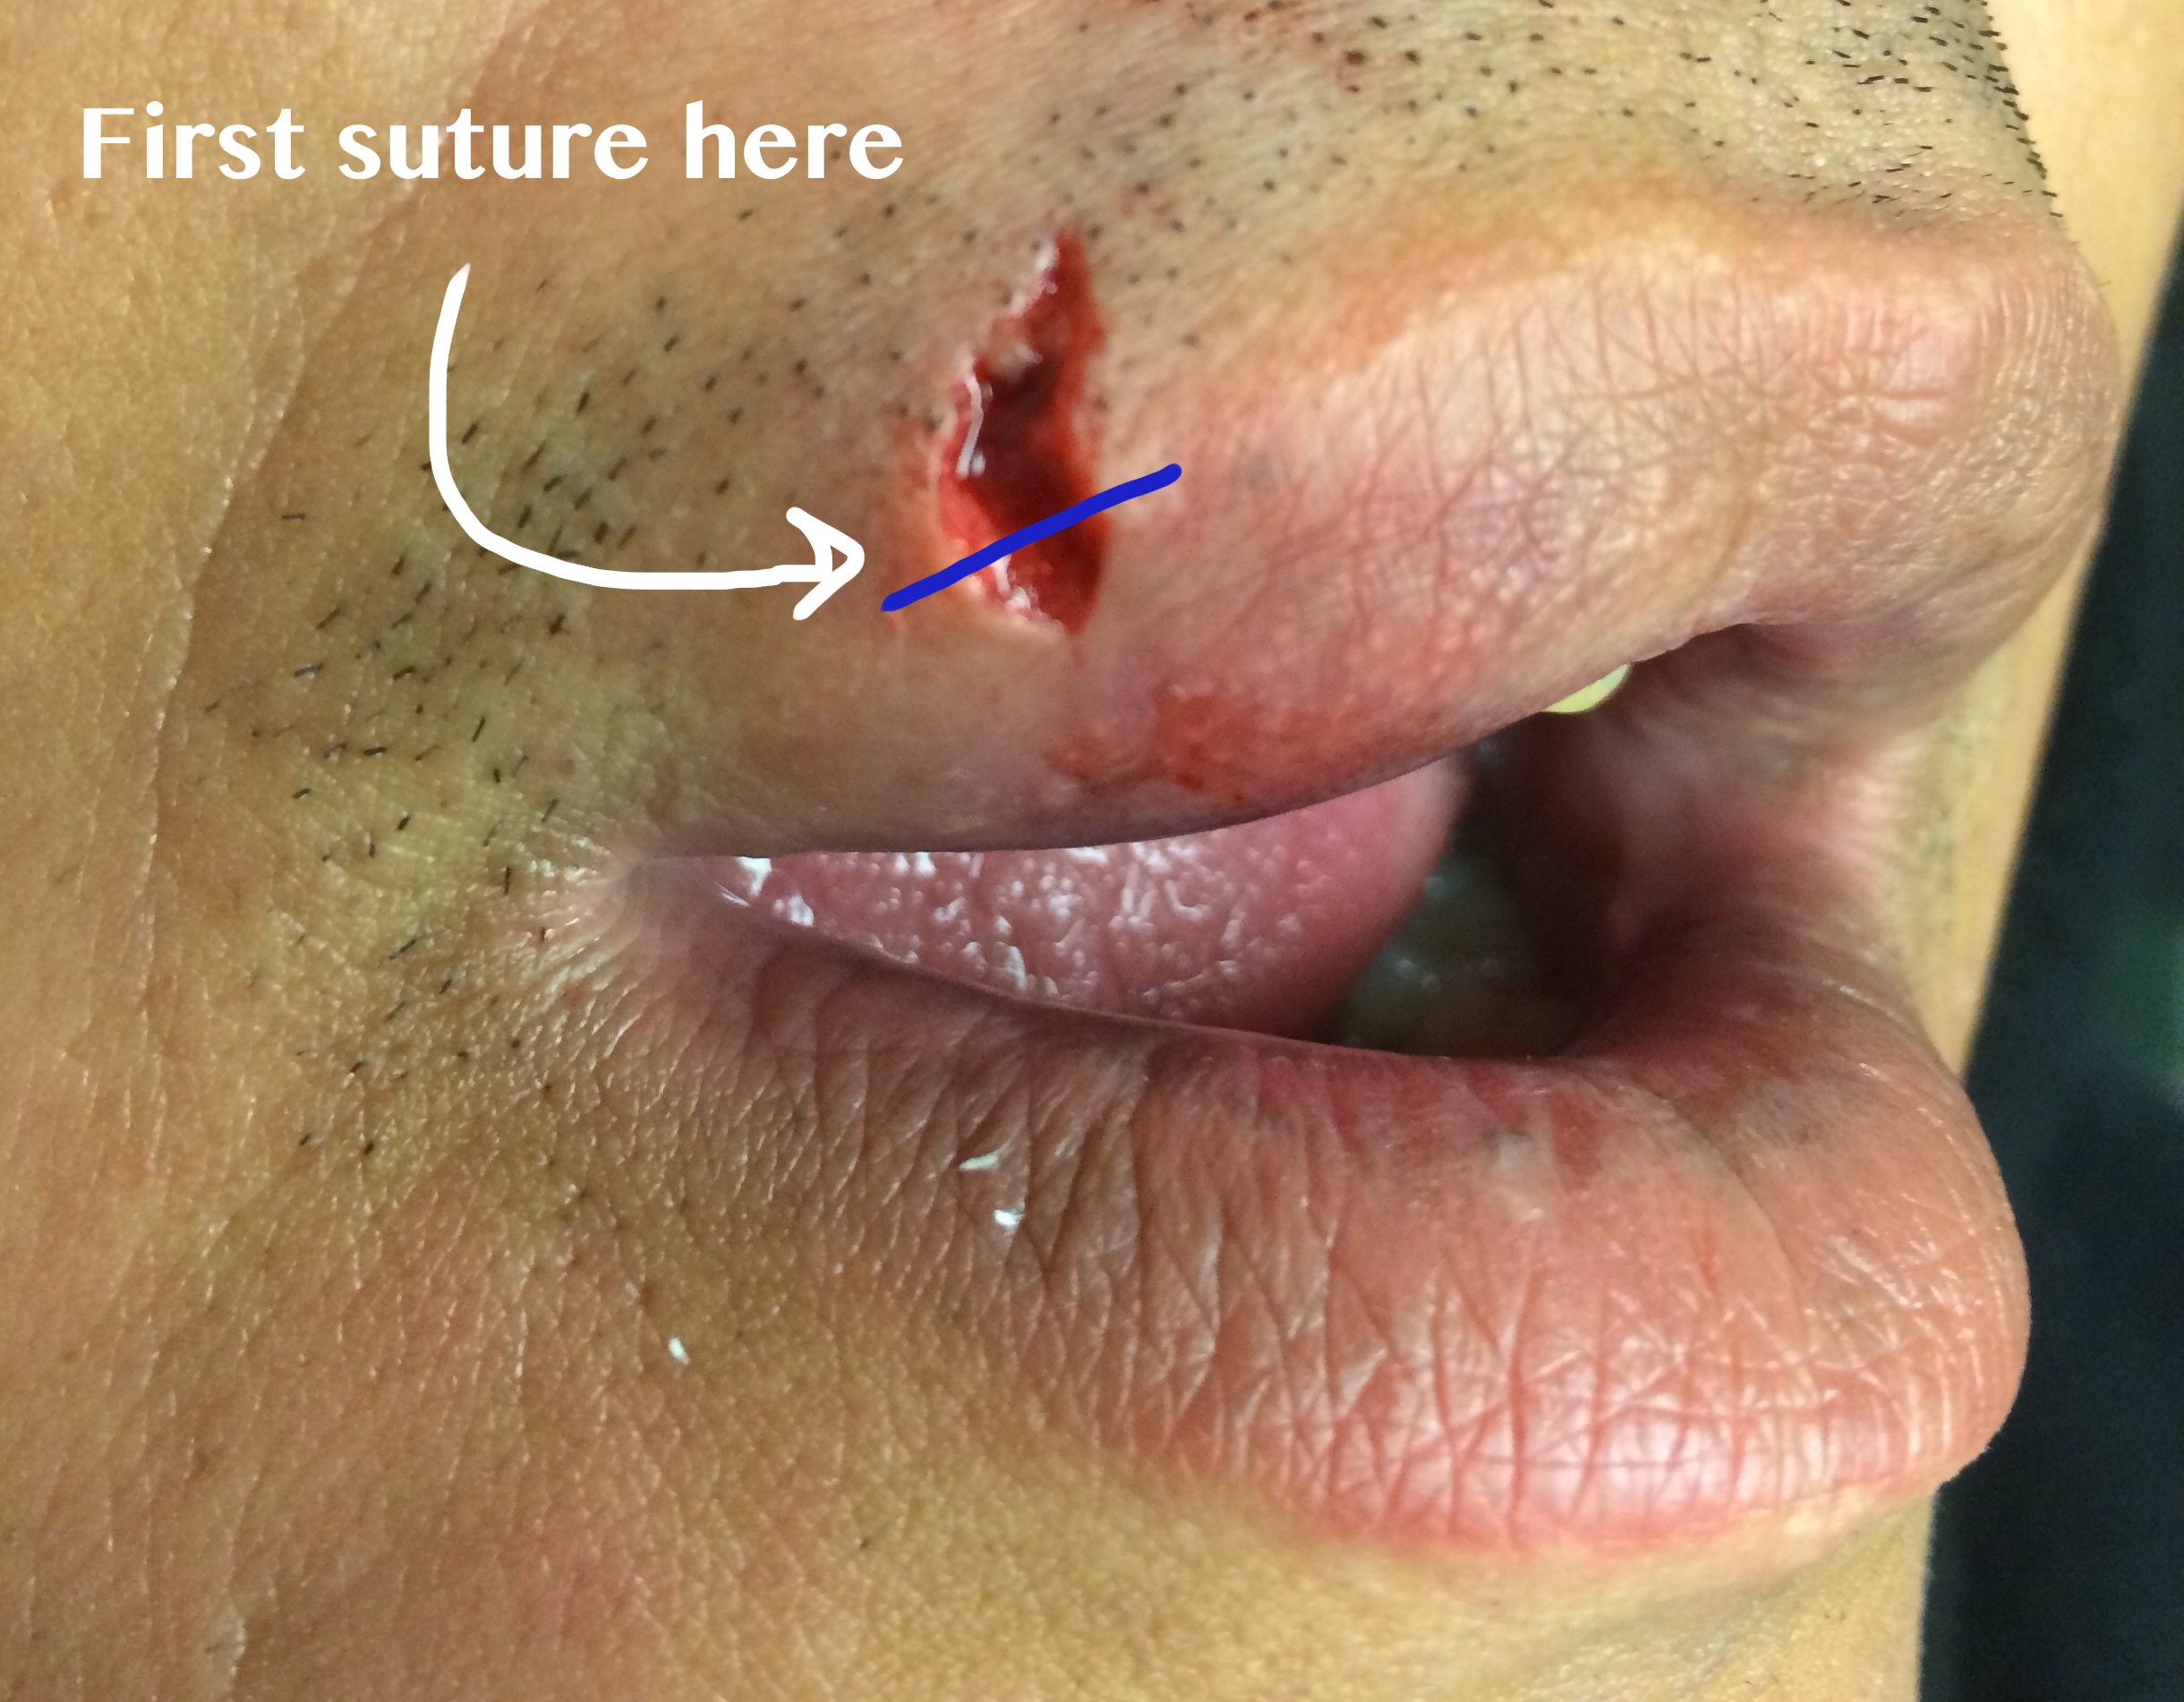 The first suture placed should approximate the margins of the vermillion-cutaneous border.
- The first suture should be a simple interrupted epidermal suture which precisely aligns the vermillion border.
- Typically I use a 6-0 non-absorbable suture such as nylon. After ensuring that this suture is correctly placed, further simple interrupted sutures can be used to bisect the wound to facilitate a well aligned & cosmetic closure.
- In cases of full thickness lacerations, judicious use of a deep layer of simple interrupted absorbable sutures can be used to close dead space.
- A through-and-through puncture type laceration involving or adjacent to the lip may best be suited for a closure in three layers.
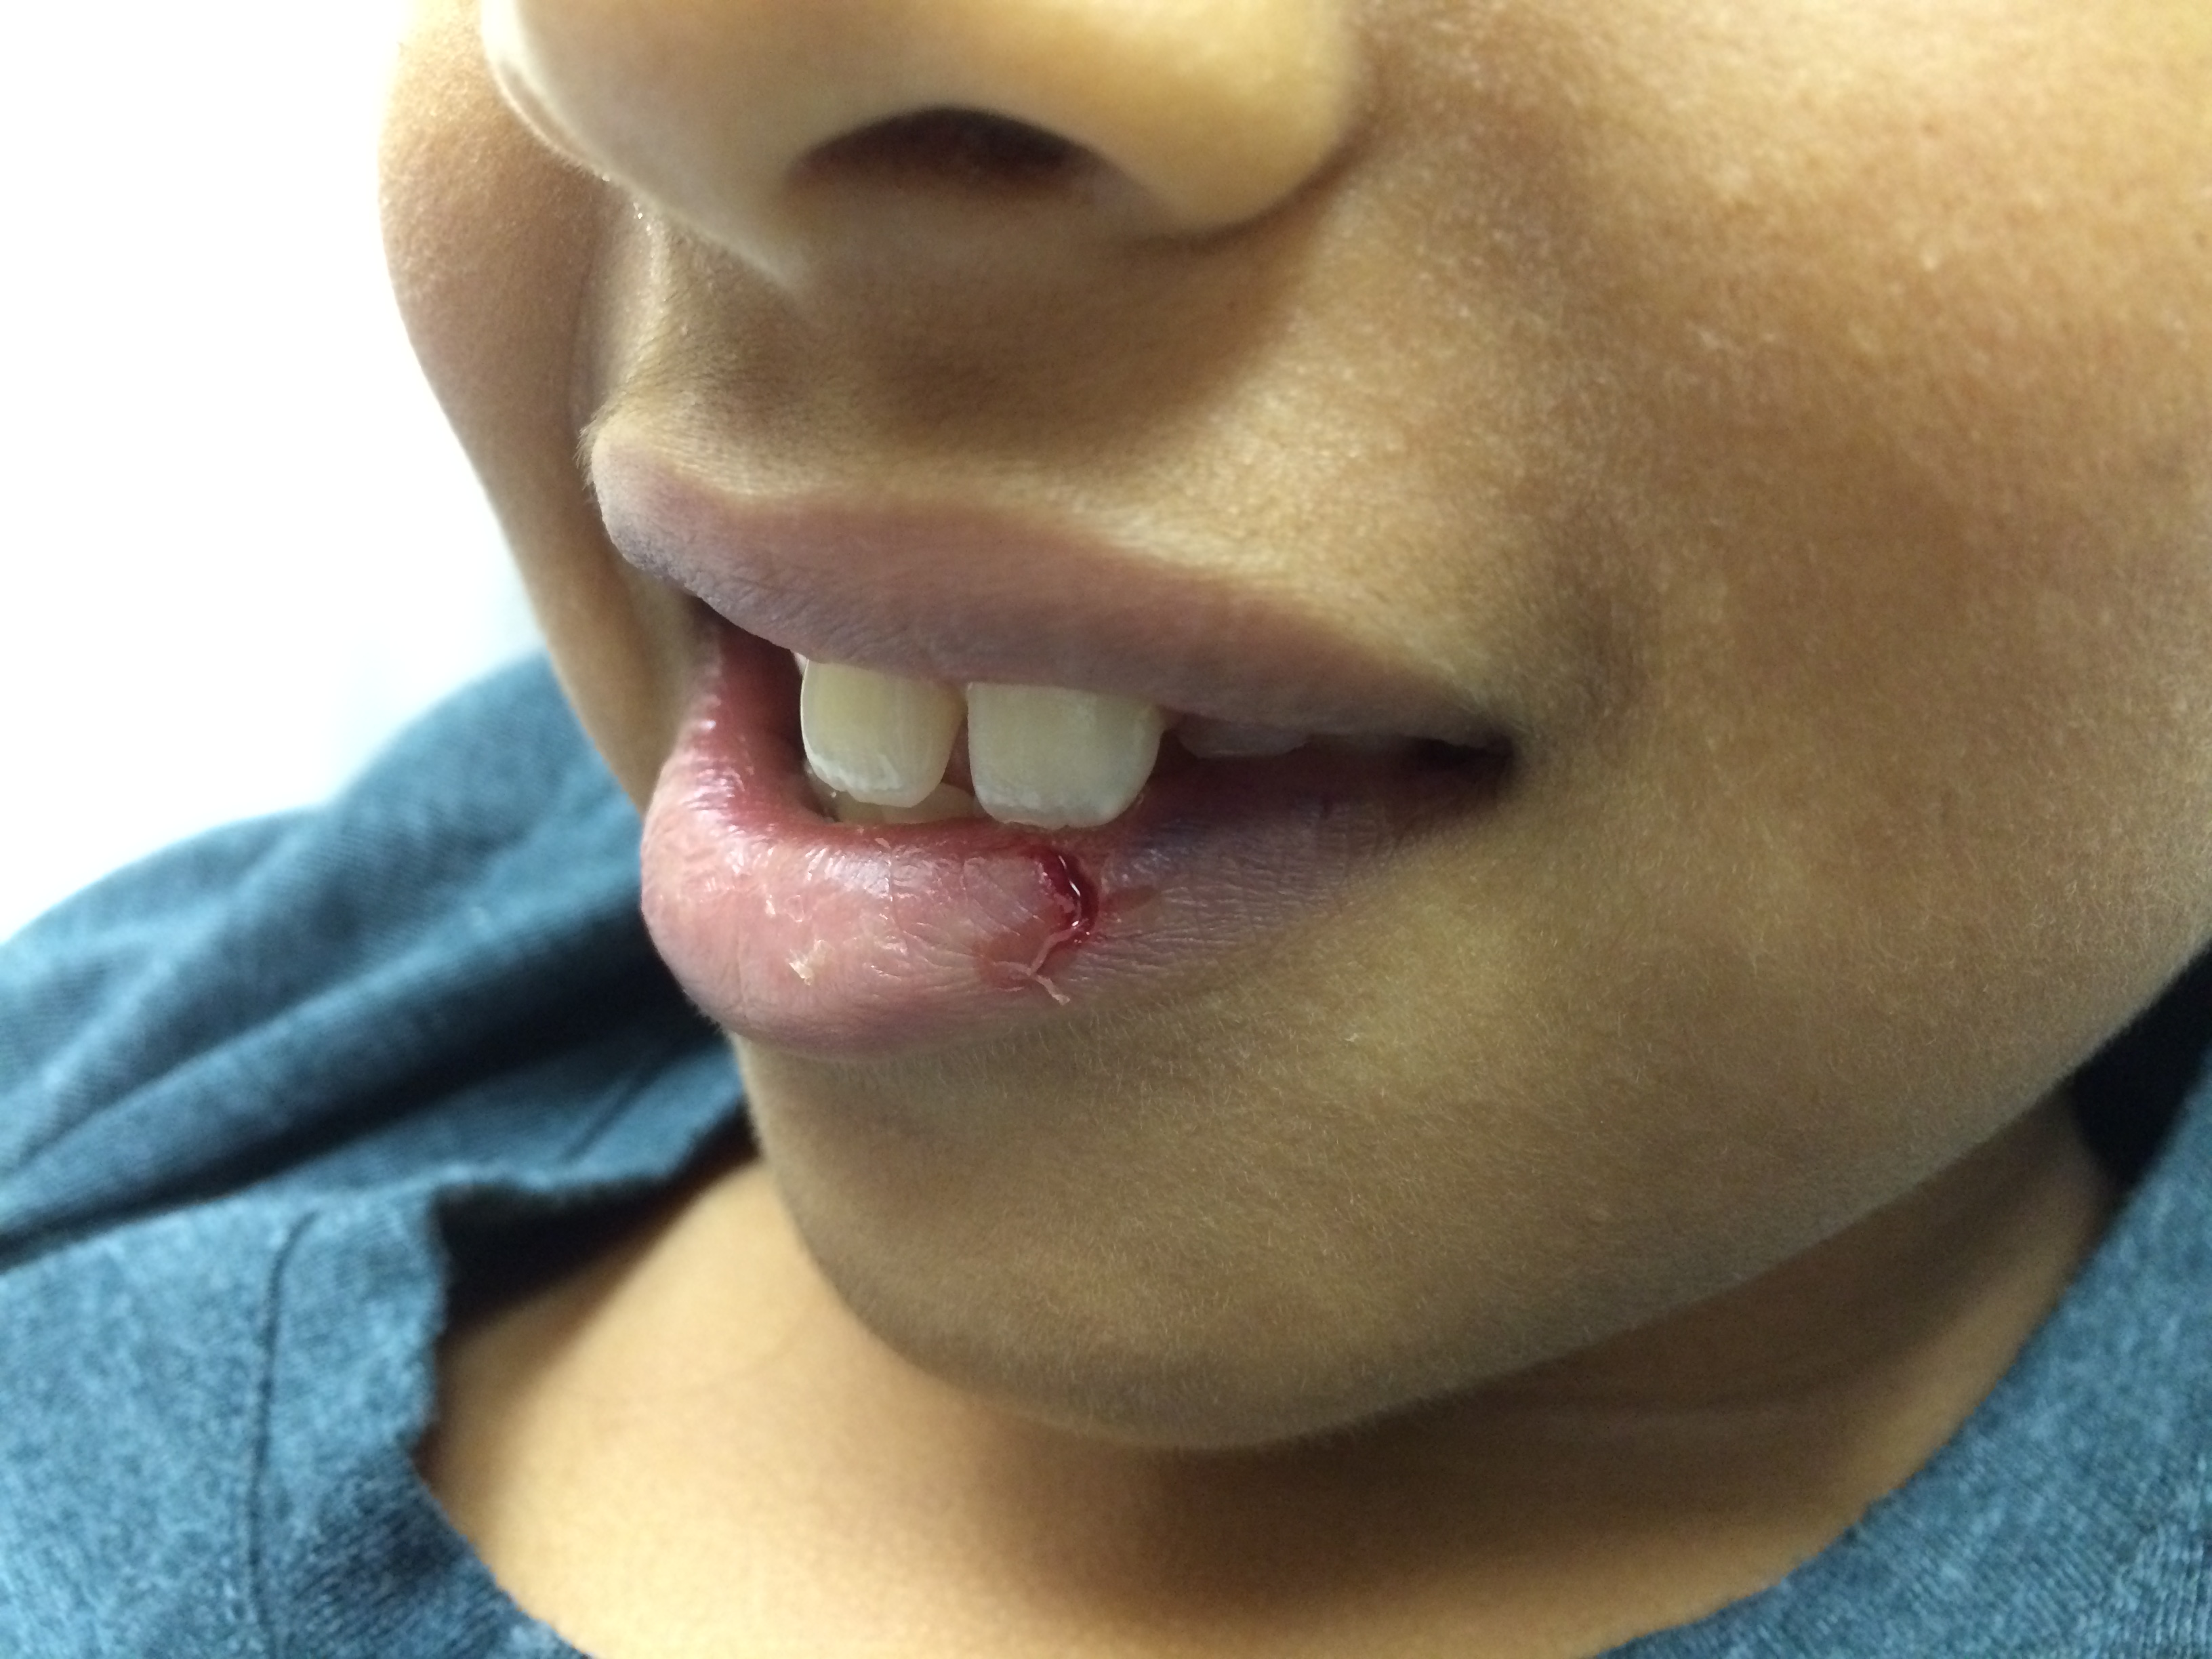 You might find yourself tempted to use absorbable sutures to close a lip laceration on a child to save a suture removal trip–but I’d think twice about it…dehiscence risk is high.
What about absorbable sutures?
Sometimes junior learners will ask me: what about using absorbable sutures on the non-mucosal (e.g., dry) side of the lip in pediatric patients, so that the child does not have to return for a suture removal (a traumatizing experience for the younger set)? In a previous post, I discussed the use of absorbable sutures without planned removal for facial lacerations and the data that supports this practice. While technically evidence supports it, I would recommend against it for most lip lacerations in children, especially involving the vermillion border. These sutures are simply not as strong as nylon (or any comparable synthetic non-absorbable suture) and thus have a higher risk of dehiscence. The tendency of a child to pick at or use his/her tongue to lick the irritating suture ends heightens this risk. You can tell the parents that, worse than suture removal, is accidental suture dehiscence and the need to apply another suture!
Mark it.

A trick of the trade which can help in placing that first suture is the use of a surgical marking pen on either side of the wound to define the vermillion border. This is especially useful prior to direct injection of anesthesia and/or irrigation (if you deem these necessary–for the counterargument, see Part I). This way if you do end up with distorted wound margins, you will still be able to recognize where point A and B should meet. NB: make sure to use a fine, pencil-tip marker–a blunt tip marker (as you might use to circle a cellulitis) is not precise enough for this situation!
Use sutures that can be found later!
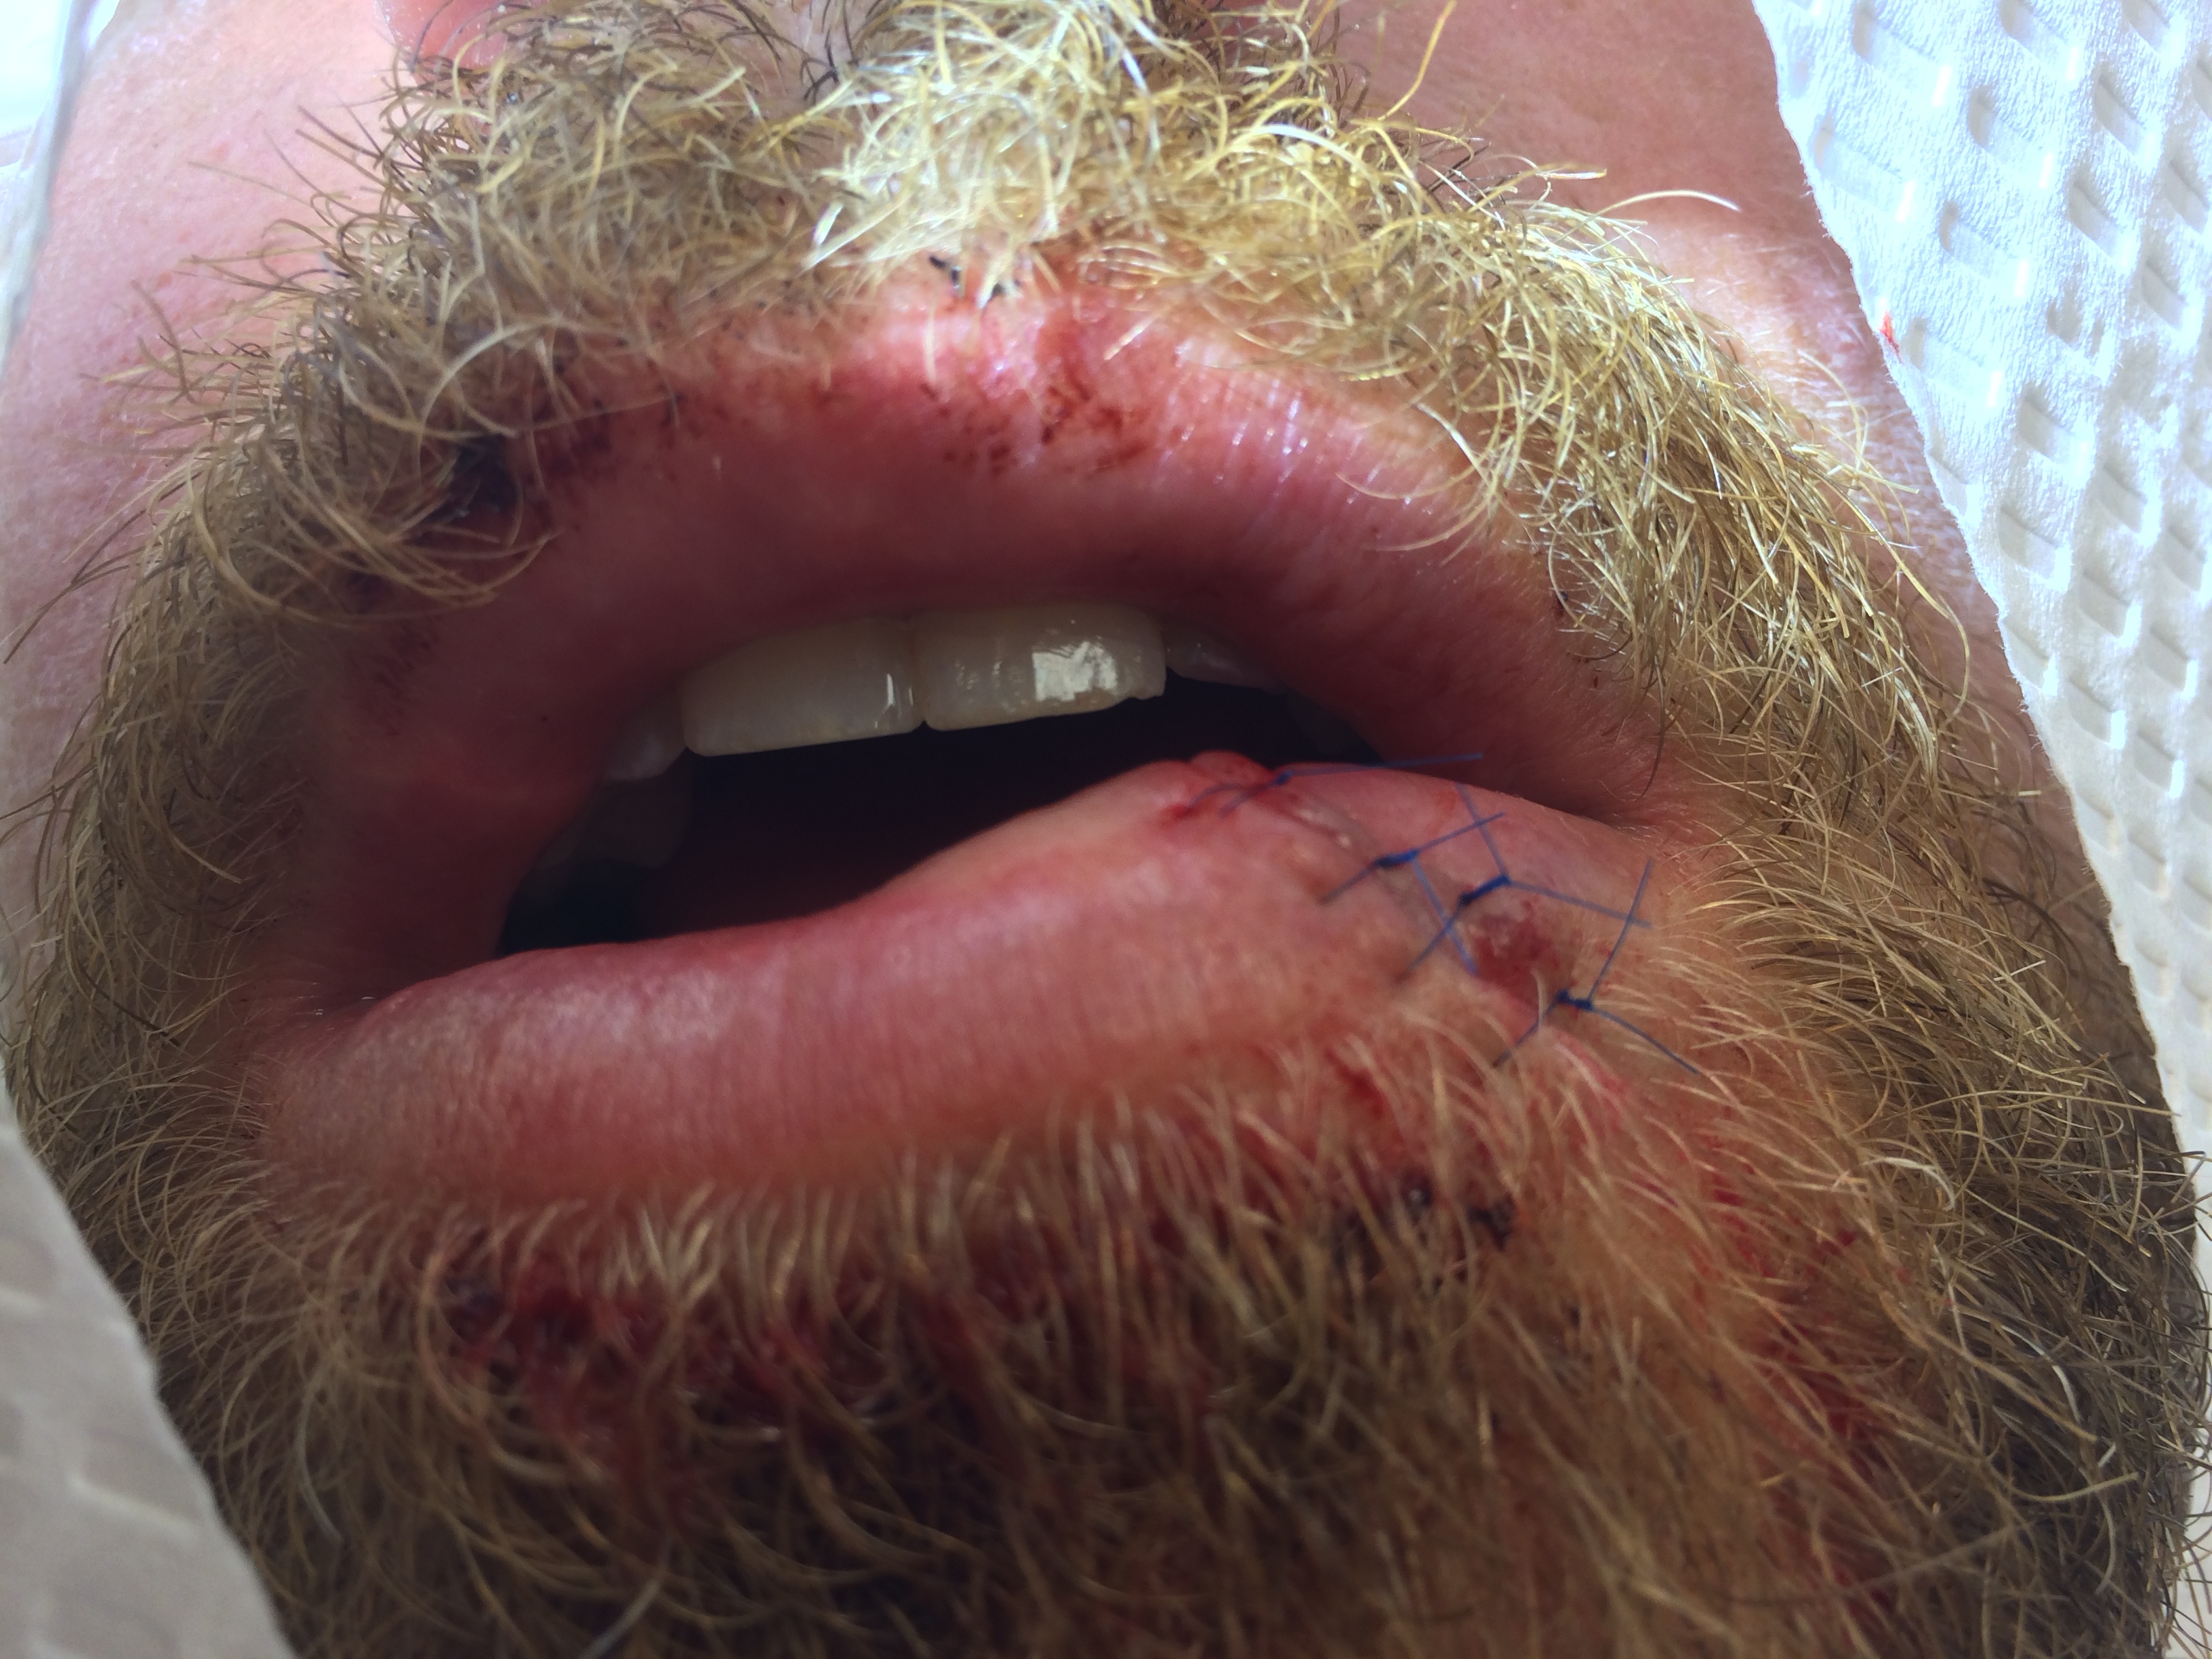 Sutures of a different color than the patient’s facial hair are important to ensure each suture loop is readily identifiable for removal.
A small detail that’s often overlooked is to (when possible) use sutures of a different color than the patient’s own facial hair. While it’s important to do this for patients with pre-existing facial hair, it’s even more important to remember to do this for patients WITHOUT facial hair—as these patients won’t be shaving in this area for a few days– and these are the patients who are likely to end up with facial hair that is similar in length to the suture threads 3-5 days later, when the sutures come out.
That’s all for this topic. I welcome comments, questions, or other tricks of the trade. While the actual technique of lip laceration repair is fairly simple, the area is high risk for cosmetic outcome and high patient satisfaction. It pays off to be prepared!

One thought on “Lip Lacerations, Part II”
Comments are closed.