
Traumatic ear lacerations can be intimidating. The multiple cartilaginous folds create shadows and curves that give the ear an aesthetic that can be very hard to re-create, even with small injuries. Adding to this complexity, putting the pieces of an ear laceration together is about more than just making it look pretty. The intricate folds and contours assist in the amplification and acquisition of sound. A misshapen ear can affect perception of hearing in subtle but noticeable ways for your patient.
Here’s an ear laceration that a colleague of mine saw in a resource-poor environment on a medical mission several years ago. Because she did not have access to suture material, the wound was cleaned and allowed to heal by secondary intention. The wound healed as shown:
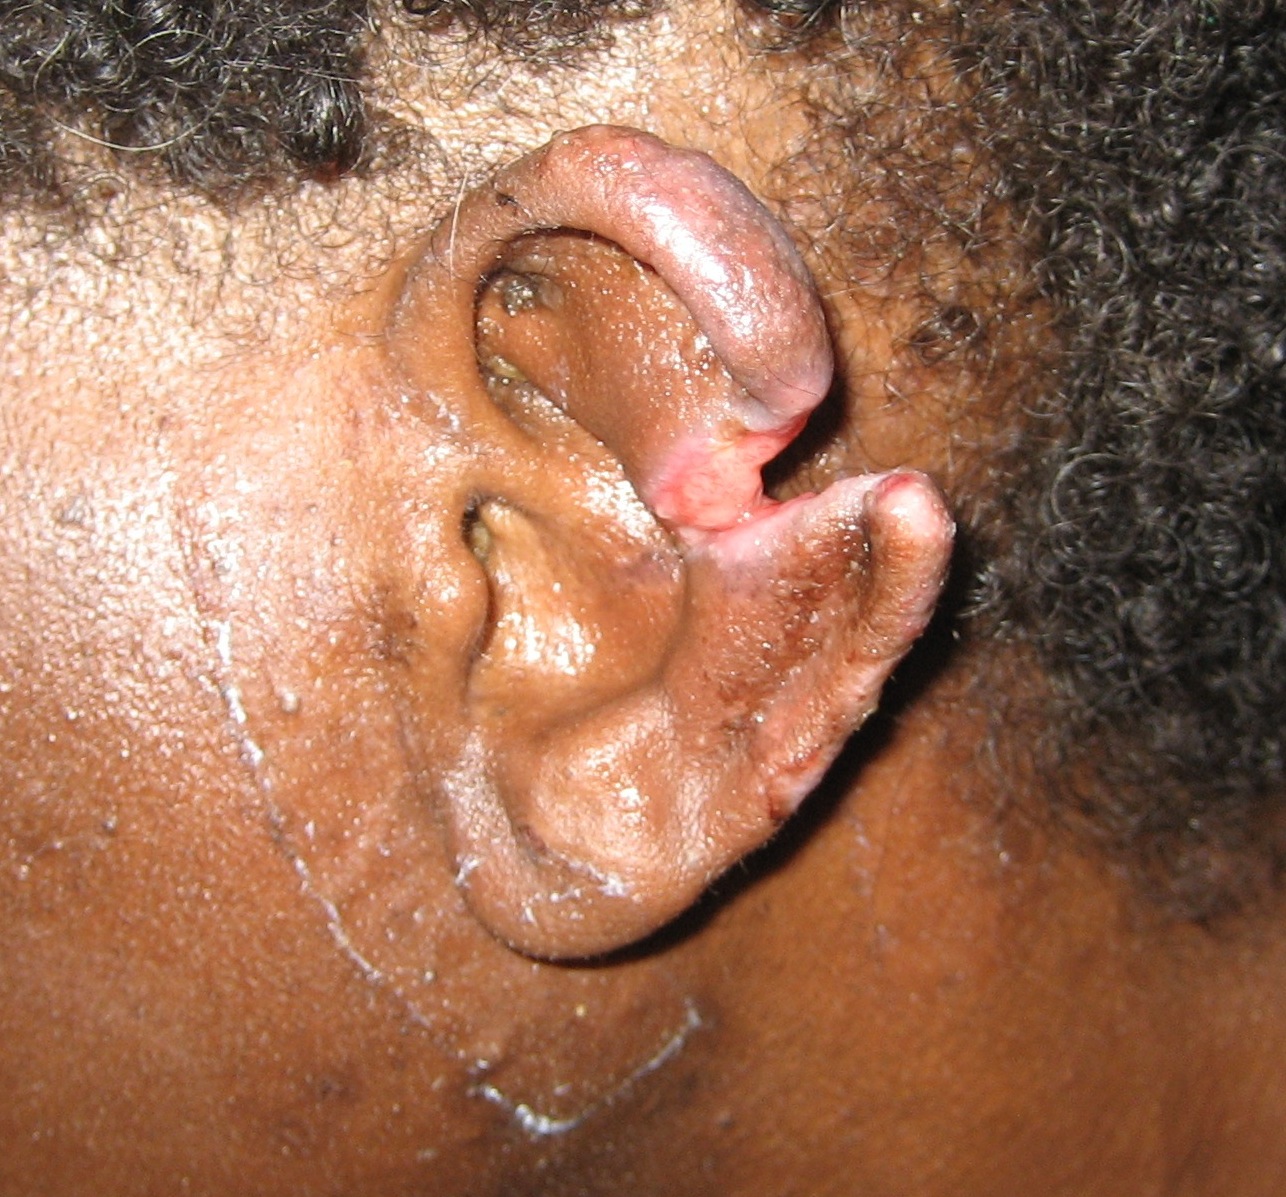 An ear laceration seen days later in a resource-poor environment. It was left to heal by secondary intention resulting in unfortunate cosmetic deformity.
Convinced yet about the importance of treating these injuries carefully? Good. Now let’s get in to it. In Part I, we’ll discuss ear anatomy, basic principles of repair, and I’ll share a video of a complex repair. Part II discusses another interesting case and complications that can arise if meticulous aftercare is not performed.
Ear Anatomy
The ear is a complicated structure, and being familiar with the terminology is important. Especially since the most complex injuries will often require specialist involvement, it’s important that an emergency provider can describe these wounds to a consultant.
The external ear consists of a prominent outer rim, the helix, and a parallel, inner rim, the anti-helix. The helix terminates in a crux immediately above the external auditory meatus, and the antihelix terminates in to superior and anterior crura which create the triangular fossa. The deep furrow which exists between the helix and anti-helix is known as the scaphoid fossa. The cavity the antihelix surrounds is the concha, which leads directly to the acoustic meatus.
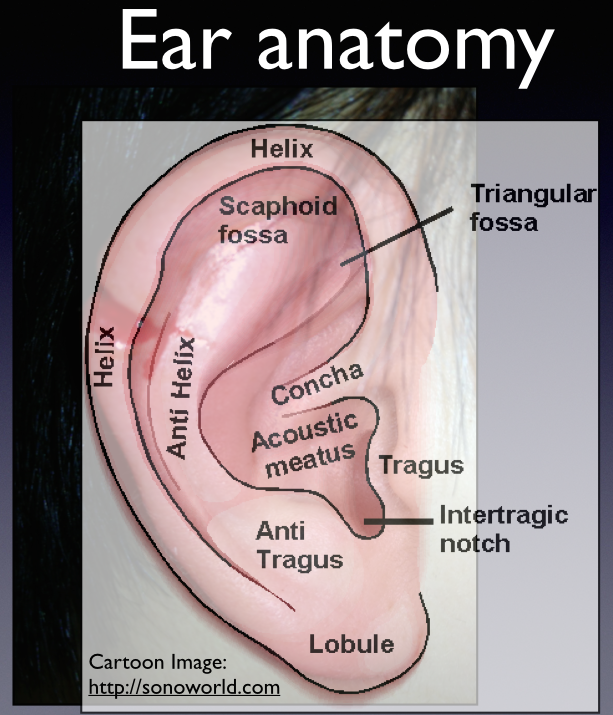 Ear Anatomy.
Key Concepts
Repair of an ear laceration involves a few basic principles:
- Cover the cartilage. The cartilage is avascular and derives its blood supply from the skin overlying it. Thus, it is critical to ensure the cartilage is covered to ensure its integrity. Fortunately, ear skin is pretty “stretchy” and can usually cover a defect pretty easily.
- For very macerated wounds along the helix, it is acceptable and sometimes advisable to perform a small triangular tissue wedge excision in order to create “surgical” wound margins that can approximate more nicely. While this may seem daunting, about 5 mm of cartilage can be removed from this area without causing significant deformity.

If the skin overlying a laceration to the pinna does not approximate, consider wedge excision.

The excision can be performed by cutting a triangle wedge from the ear, extending as necessary in to the anti helix.
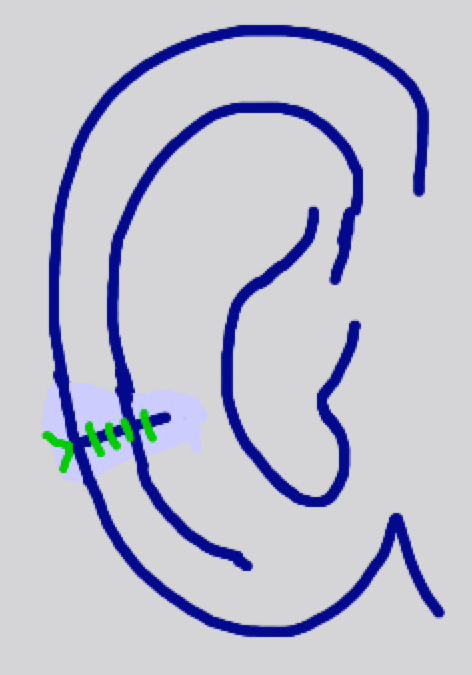
Attempt to allow at least 1mm of skin “overhang” beyond the cartilage on either side to allow approximation with skin eversion and complete cartilaginous coverage.
- For deep/extensive wounds, consider layered closure. First, close the cartilage with simple interrupted deep dermal sutures, such as 5-0 or 6-0 vicryl. Try to approximate the outer cartilage layer, the perichondrium, rather than piercing the mid-portion of the cartilage which is more fragile and prone to tear. Then, close the skin with simple interrupted non-absorbable sutures such as 5-0 or 6-0 nylon or ethilon. It’s a good idea to start by suturing along the less cosmetically noticeable posterior aspect of the ear in order to make sure the wound comes together easily.
For less complicated closures, using a single layer of simple interrupted non-absorbable sutures through-and-through the skin and perichondrium may suffice.
The video below details the repair of one of the worst lacerations of an ear I have ever seen. The patient was seen by an emergency physician in my department. He conferred with plastic surgery on this one (rightly so) but ultimately he performed the repair himself. Watch the video until the end to see the remarkable outcome.
That’s enough to digest for one post–check out Part II for more on this interesting and complex topic!
