
If you are an EM:RAP listener, you may have had a chance to listen to the six-part series that myself, Dr. Jonathan Kantor, and Dr. Zack Shinar recorded on wound closure best practices, tips/tricks, and controversies. In our discussion, we hit on everything from the nuances of how to place the perfect simple interrupted suture all the way to best management of complex acute wounds.
One topic that Dr. Kantor mentioned which raised a few eyebrows for the audience was the use of the set-back dermal suture. I am venturing a guess that most of us coming from the world of Emergency Medicine don’t have great familiarity, if any, with this technique.
So, here’s a quick primer to get you in the know:
What:
An alternative to the deep dermal suture, the set-back dermal suture is used for subcutaneous closure of surgical wounds and selected traumatic lacerations.
Where:
This technique is best used for wounds in areas under significant tension.
Why:
This technique has the advantages of deep-tension relief while creating effective eversion of the skin surface with simultaneous wound edge apposition, such that an additional epidermal layer of sutures is often not needed.
How:
While it may seem tricky at first glance, with visualization and practice any skilled provider can adopt this technique. If you had trouble following the video above, try breaking it down step-by-step with these schematic cartoons:
Preparation: Undermine the wound in order to visualize the underside of the dermis. Being able to see the underside of the dermis is paramount to the success of this technique.

(1) Reflect back the dermis, and insert the suture needle at 90 degrees into the underside of the dermis, 2-6 mm from the wound edge.

(2) Follow the needle curve and exit closer to the incised wound edge, but not within it–about 1-4 mm from the edge.

(3) Now reflect back the opposite side of the dermis, in order to visualize the underside of the dermis on the second side.
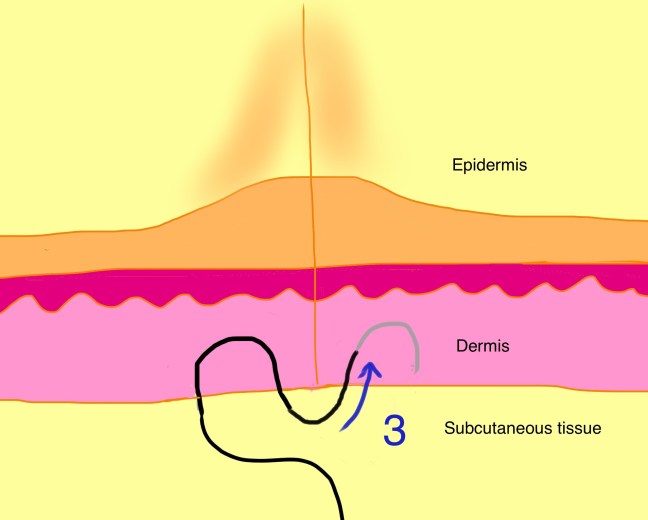
Take a second bite, this time entering nearer to the incised wound edge (1-4 mm).
(4) Follow the curve of the needle to exit farther (2-6 mm) from the incised wound edge.
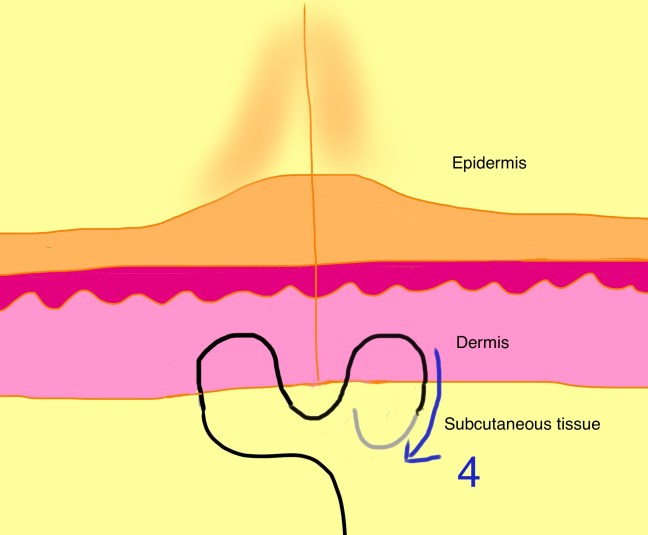
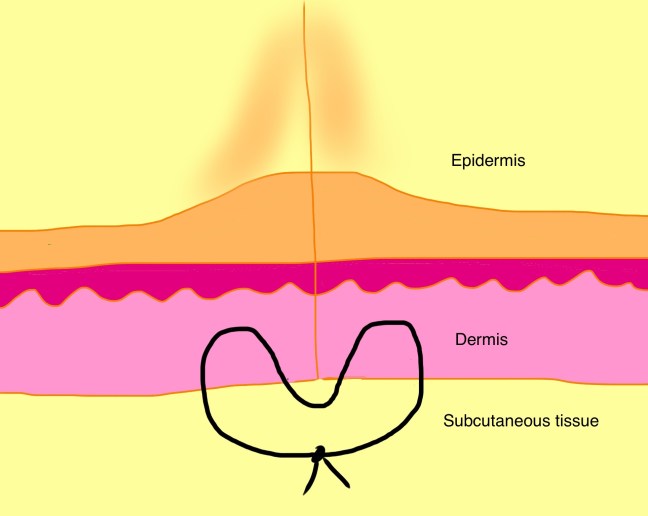
Use an instrument tie to bring together the free suture ends, and this pattern emerges:
Know before you go:
Use of an absorbable suture of adequate sizing to withstand dynamic and static tension is recommended. Since the suture is buried deeper than your traditional deep dermal suture, upsizing to a slightly larger suture is acceptable. (eg, a 3-0 suture rather than a 4-0 on the extremities; a 5-0 rather than a 6-0 suture on the face).
Final thoughts:
While not quite as easy as a simple deep dermal interrupted suture, and certainly requiring a bit more preparatory work involving tissue undermining, the technique confers some definite advantages. The obvious highlight is the ability to bring together the wound edges without placement of an epidermal suture layer. The technique was so effective that it was used as the primary suturing technique in a dermatology study which set out to debunk the myth of eversion. I recommend practicing the dermal set-back suture on a model with some tissue laxity, such as a pig’s foot, before taking it to the human realm.
